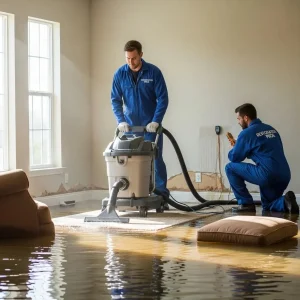
Flood damageassessment is the systematic process of identifying, documenting, and prioritizing harm to a property after inundation. A timely, structured assessment reduces health risks, repair costs, and insurance delays. This guide explains what to check first, how to document damage for insurers, how to detect hidden water and structural compromise, and when to bring in professionals for specialist testing and remediation. Homeowners will learn practical safety precautions, step-by-step photo and inventory techniques for claims, diagnostic tools such as moisture meters and thermal imaging, and clear decision rules for mold and contents restoration. The article maps the assessment workflow from immediate external safety checks through detailed internal inspections, covering electrical and HVAC risks, mold detection timelines, and content salvageability. Readers will also find EAV reference tables linking building elements to inspection methods, a damage/salvage table for contents, and a remediation urgency table for mold, all designed to speed decision-making and strengthen insurance outcomes. This practical, localised approach uses current best practice and tool-focused guidance to help you assess the extent of flood damage in your home effectively.
What Are the Immediate Safety Precautions After a Flood?
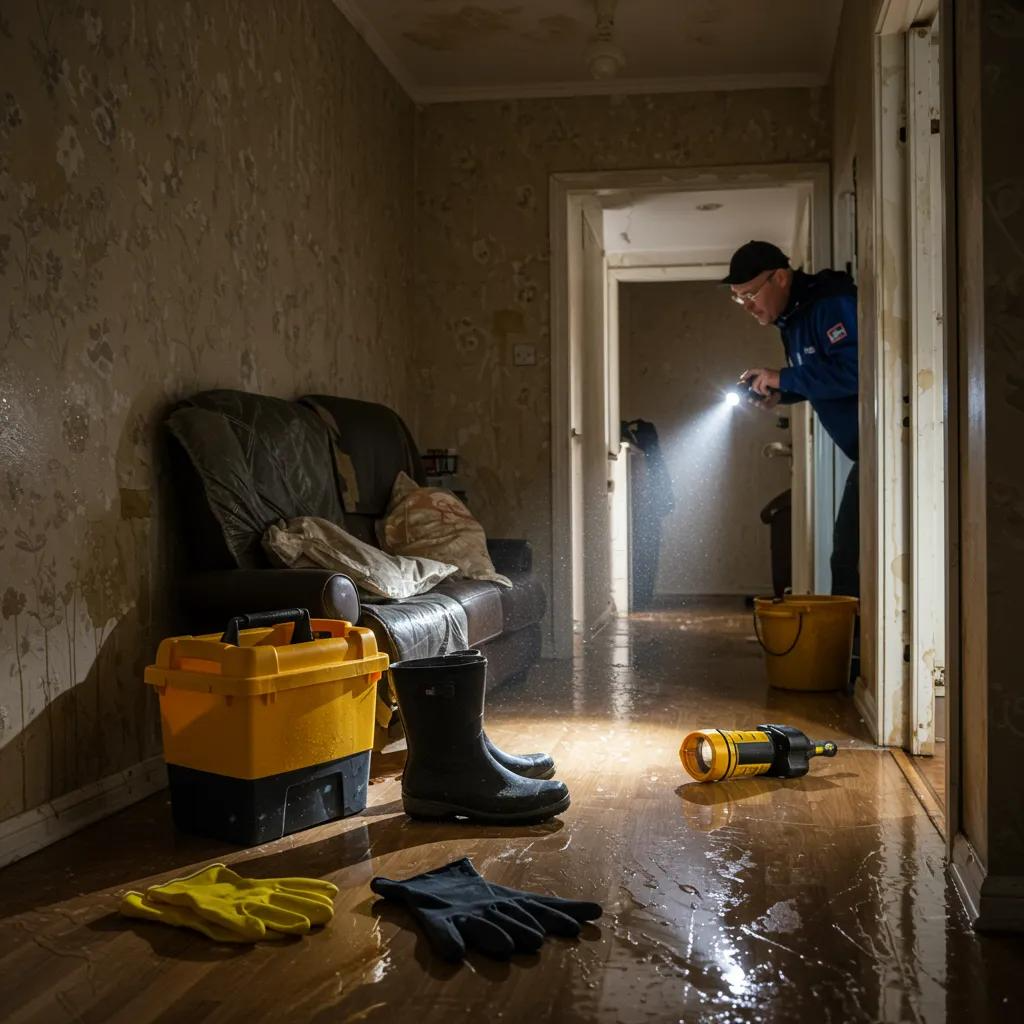
Immediate safety precautions after a flood are actions that protect people from injury, prevent further property damage, and preserve evidence for insurance, they focus on avoiding electrical shock, contamination, and unsafe structures. Prioritising personal safety and keeping clear of unstable areas reduces the risk of collapse, electrocution, and exposure to contaminated water. These steps also preserve evidence required for claims and inform the need for emergency temporary repairs. Follow a priority sequence: external assessment, utility isolation where safe, PPE use, and swift contact with emergency services or professionals for unsafe structures. The next subsection explains how to safely isolate utilities without creating additional hazards.
How Do You Safely Turn Off Utilities After Flooding?
Turning off utilities safely reduces electrocution and gas-related dangers but must be done with caution and only when safe to approach the meter or switchboard. First, avoid standing in water when working with electrical panels; if water is present around the switchboard, wait for a qualified electrician or emergency services to isolate power. For electricity, switch off the main circuit breaker from dry ground if accessible; if unsure, do not attempt and mark the area for professionals. Gas isolation usually involves closing a visible shut-off valve, but relighting or testing requires a licensed gas fitter; always inform the gas provider if flooding has affected supply. Knowing when to stop and call professionals preserves safety and prevents further damage, which leads into the personal protective equipment homeowners should use when inspecting.
What Personal Protective Equipment Should You Use During Assessment?
Personal protective equipment (PPE) reduces exposure to biological contaminants, sharp debris, and chemical hazards commonly present after flood events and varies by contamination level. At minimum, wear sturdy rubber or waterproof boots, heavy-duty gloves, eye protection, and an N95 or P2 respirator when inspecting areas with potential mold or sewage. For black water exposure or heavy contamination, use disposable coveralls and higher-grade respirators, and always decontaminate reusable PPE after use to avoid cross-contamination of clean spaces. Proper PPE also protects documentation efforts, ensuring photographs and inventories can be captured safely before items are moved, which connects naturally to safely performing an external structural risk check before entry.
How Can You Identify Immediate Structural Risks from Outside?
A safe external inspection establishes whether the building envelope shows signs of compromise that make entry dangerous, focusing on foundation settlement, large cracks, and roof or wall deformation. From a safe distance, look for leaning walls, gaps between walls and the ground, sagging rooflines, and large horizontal or stair-step cracks in masonry that indicate differential movement; avoid entering if these signs are present. Use binoculars or photos to document external damage and take wide-context images that show the house relative to neighboring fixed points, which both protects you and preserves evidence. If structural risks are suspected, do not attempt internal inspection, instead, contact structural engineers or emergency restoration specialists who can perform a safe, invasive assessment.
For urgent help with immediate hazards, Flood Squadprovides 24/7 emergency response and same-day on-site assessment to secure properties and advise on safe next steps. Contact Flood Squadfor a free assessment and guidance on emergency stabilisation, especially if external checks suggest structural compromise or widespread contamination.
How Do You Document Flood Damage for Insurance Claims?
Documenting flood damage for insurance claims is a methodical process of creating timestamped visual evidence, a room-by-room inventory, and records of temporary repairs and expenses so insurers can assess loss accurately. Good documentation reduces disputes and accelerates claim settlement by providing clear before/after context, item descriptions, and proof of actions taken. Use a standard sequence: wide-room photos, close-ups of damage, serial numbers and receipts where possible, plus short narrated videos walking through each damaged area. The following subsections explain best practices for photo/video capture, creating a detailed inventory, and the timing of insurer contact.
What Is the Best Way to Capture Photo and Video Evidence?
Capture photo and video evidence that clearly shows scale, context, and timestamps so adjusters can verify damage origin and extent without ambiguity. Take wide-angle shots of each room to show location context, then close-ups of damaged elements and belongings; include a written or verbal timestamp in videos and narrate what each shot shows to provide organised evidence. Photograph serial numbers, labels, and receipts for high-value items and document temporary repairs with before-and-after images plus receipts for materials and labor. Consistent, methodical media capture reduces follow-up requests from insurers and supports quicker assessment, which pairs directly with a structured inventory of damaged items that follows.
What this photographic checklist includes:
- Wide room shots showing overall damage context and fixed reference points.
- Close-up images of specific damage, serial numbers, and labels.
- Short narrated walkthrough videos with visible timestamps.
How Do You Create a Detailed Inventory of Damaged Items?
A detailed inventory organises possessions by room, describes damage, estimates value, and notes salvageability to support accurate loss valuation during claims processing. Start with high-value items, record make/model/serial numbers, and attach photos; for general contents, list item, condition, estimated purchase date, and whether it was exposed to clean/grey/black water. Prioritise items for salvage where safe, electronics, important documents, and heirlooms, and note any professional restoration steps taken. Keep receipts for temporary storage, disposal, and emergency repairs; this paper trail strengthens your claim and informs the insurer about steps taken to mitigate further loss, which leads into when and how to notify your insurer.
| Item Category | Damage Type / Water Classification | Recommended Documentation / Action |
| Electronics | Water-exposed (unknown contamination) | Photograph serials, power-off, tag “do not use”, seek professional drying report |
| Upholstery & Soft Furnishings | Soaked by grey/black water | Photograph, mark salvageable/non-salvageable, keep receipts for disposal |
| Documents & Records | Wet or soggy | Photograph, air-dry or freeze-dry if possible, obtain specialist conservation report |
When and How Should You Contact Your Insurance Provider?
Notify your insurer promptly after ensuring personal safety and basic stabilisation, and provide clear, organized documentation to speed the claim intake and assignment of an adjuster. When you contact them, record the claim number, the name of the adjuster, the time and details of your notice, and summarise the evidence you will submit, photos, inventory, and receipts for temporary repairs. Ask about temporary emergency cover, contents storage, and whether they require pre-approval for specific remediation work to avoid disputes later. Maintain a single folder of all communications and documents so you can respond quickly to adjuster requests, which complements the option of obtaining a professional assessment to strengthen your paperwork.
Flood Squadcan assist with professional documentation as part of a free assessment, providing timestamped reports and inventory support that many insurers find valuable during claims review. If you prefer, request a documented on-site assessment that includes calibrated measurement readings and a concise report to submit with your claim.
How Do You Assess Structural and Hidden Water Damage in Your Home?
Assessing structural and hidden water damage combines visual inspection with diagnostic testing to locate moisture in cavities, behind finishes, and within foundations, since hidden water often causes long-term deterioration and mold if left untreated. Visible signs like staining, warping, and bulging indicate infiltrated moisture, but non-invasive tools such as moisture meters and thermal imaging help map hidden wet zones without immediate destructive work. Systematic mapping of moisture across building elements prioritises invasive follow-up where necessary, and documented readings support insurance and repair decisions. The following subsections detail visible indicators, foundation inspection cues, and the tools used to detect concealed moisture.
What Are the Signs of Structural Damage in Walls, Ceilings, and Floors?
Visible structural water damage manifests as discoloration, paint blistering, buckled floorboards, and sagging ceilings, and these signs indicate that moisture has affected building fabric and potentially structural components. Peeling paint, soft or spongy plaster, bulging drywall, and hairline to larger cracks in walls point to prolonged wetting or movement from saturated substrates. Floorboard separation, track marks in timber, and persistent musty odors indicate moisture trapped beneath finishes and may signal hidden mold growth, requiring faster action. Spotting these signs early helps prioritise areas for moisture profiling and informs whether temporary drying or invasive inspection is necessary.
| Building Element | Common Signs of Damage | Inspection Method / Tool |
| Wall cladding & plaster | Staining, bulging, paint loss | Pinless moisture meter, probe checks, limited cut-out if readings high |
| Ceiling & roof timbers | Sagging, water stains, dark patches | Thermal imaging for cold/wet spots, visual attic inspection |
| Subfloor & joists | Soft spots, odor, board separation | Pin moisture meter, crawlspace inspection, bore-scope for cavities |
How Do You Inspect Foundation and Load-Bearing Elements?
Inspection of foundations and load-bearing elements looks for differential settlement, crack patterns, and movement that indicate structural compromise and the need for professional engineering assessment. Horizontal cracks, widening vertical fractures, and step-cracking in masonry often reveal soil movement or hydrostatic pressure changes; look for doors or windows that stick as indicators of movement. Where concrete or masonry shows spalling or rust staining near reinforcement, document and avoid cosmetic assumptions, these may be structural. If signs of foundation settlement or load-bearing distress exist, a structural engineer’s assessment is required to determine remedial options and ensure safe, code-compliant repairs.
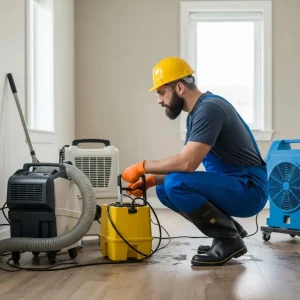
What Tools Help Detect Hidden Water Damage, Like Moisture Meters and Thermal Imaging?
Non-destructive tools such as pin and pinless moisture meters, thermal imaging cameras, and air quality monitors reveal moisture presence, temperature anomalies, and airborne spores that signal hidden water damage. Pin meters measure moisture content by electrical resistance and are useful for specific material checks; pinless meters estimate moisture by capacitance and are faster for surface mapping. Thermal cameras detect temperature differentials often caused by evaporative cooling over wet zones, highlighting areas for targeted measurement; air quality monitors identify elevated particulate or spore counts indicative of mold. Correct interpretation of combined tool readings, moisture percentage, thermal anomalies, and air spore data, creates a knowledge graph of wet zones guiding invasive testing and drying strategies.
How Should Electrical and HVAC Systems Be Evaluated After Flooding?
Evaluating electrical and HVAC systems after flooding requires professional inspection because water exposure can create hidden corrosion, short circuits, and contamination within ducting that pose immediate health and fire risks. Qualified electricians and HVAC technicians perform insulation resistance testing, visual component checks, and verification of safety devices, while documenting their findings for insurers. Preventing energisation of suspect systems until cleared avoids shock and fire hazards, and professional reports also support claims by describing required repairs and safety certification. The next subsections explain why electrical inspection is essential and outline gas and appliance checks.
Why Is Professional Inspection Necessary for Waterlogged Electrical Systems?
Professional inspection is necessary because water can compromise insulation, corrode conductors, and create concealed faults that simple visual checks cannot detect, and energising a wet system risks electrocution and fire. Electricians perform insulation resistance testing, continuity checks, and load tests, along with documented visual verification of switchboards, wiring, and distribution equipment. Certified testers provide reports and safety certificates that many insurers require before authorising reconnection, and such documentation helps prevent liability and repeat failures. Given the complexities and hazards, DIY attempts at restoring electrical systems are unsafe and counterproductive, so call a licensed electrician for verification and written clearance.
How Do You Check Gas Lines and Appliances for Flood Damage?
Gas systems and appliances require shut-off, sealed inspection, and certification because water can cause internal component corrosion and create dangerous leaks if appliances are relit prematurely. Do not attempt to relight or use gas appliances until a licensed gas fitter or authorised technician inspects the appliance, tests seals, and certifies safe operation. Visually, look for sediment, corrosion, and watermarks on appliances and their flues, and report any odd smells or hissing sounds immediately. Professionals will pressure-test lines where necessary and issue clearance documentation that supports both safety and insurance claims; this inspection approach mirrors the careful handling required for HVAC contamination checks.
What Are the Signs of Mold Growth and How Is It Remediated?
Recognising mold early and understanding remediation thresholds helps protect occupant health and the building fabric because mold can develop rapidly and spread through hidden cavities if moisture is not controlled. Mold growth typically begins within 24–48 hours after persistent moisture exposure under warm conditions, and early detection relies on both visual and odor cues. Remediation ranges from targeted cleaning and drying for small, non-toxic areas to full containment, negative-pressure removal, and sterilisation for extensive or black-water-exposed infestations. The following subsections explain timelines, visual/odor signs, and when professional remediation is required.
How Quickly Can Mold Develop After Flood Damage?
Mold can begin to germinate within 24–48 hours when porous materials remain damp, and the risk accelerates with warm, humid conditions and organic substrates like timber and drywall. Spores settle and colonise damp surfaces rapidly; therefore, immediate drying and dehumidification significantly reduce colonisation risk. The timeframe for visible colonies may vary, but invisible hyphal growth can weaken substrates and cause odors well before patches are large enough to see. Because of rapid onset, prompt drying and assessment are critical to avoid larger, costlier remediation later.
| Mold Indicator | Timeframe / Risk Level | Recommended Remediation Action |
| Musty odor only | 24–48 hours / Moderate | Begin drying immediately, inspect cavities, use air quality monitoring |
| Visible spotting <1m² | 48–72 hours / Moderate-High | Isolate area, clean with detergent/disinfectant, dry thoroughly |
| Extensive growth or black-water exposure | >72 hours / High | Call professionals for containment, negative pressure removal, and sterilisation |
What Visual and Odor Signs Indicate Mold Presence?
Visual signs of mold include dark spots, fuzzy textures, and discoloration on surfaces, while a persistent musty smell often indicates hidden growth even when surfaces appear unaffected. Check behind cupboards, under carpets, inside HVAC ducts, and in ceiling cavities where concealed moisture commonly fuels growth; HVAC-related mold may cause odors when systems run. If occupants experience unexplained respiratory irritation or allergy symptoms, prioritise air quality testing and targeted visual inspection. Detecting odor cues early enables focused inspection and reduces the area requiring remediation.
When Should You Call Professionals for Mold Remediation?
Call professionals when mold affects more than approximately 1m², when growth follows black-water exposure, when occupants are medically vulnerable, or when mold is inside structural cavities or HVAC systems. Professionals provide containment, controlled removal, HEPA-filtered negative pressure, and verified sterilisation steps that DIY cleaners cannot safely replicate for extensive contamination. Look for remediation teams experienced in both mold removal and documentation for insurers, since professional reports support claims and ensure long-term safety. Engaging specialists early reduces recontamination risk and helps restore safe indoor air quality.
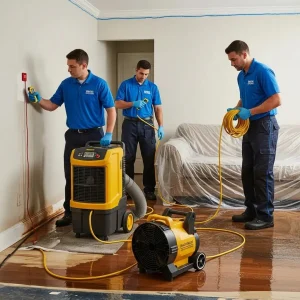
How Do You Evaluate and Restore Personal Belongings After Flood Damage?
Evaluating and restoring personal belongings begins with categorising items by material, contamination level, and sentimental or monetary value to decide salvage pathways such as professional freeze-drying for documents or specialised sterilisation for textiles. Quick triage helps prevent secondary damage: remove wet items to a dry, ventilated area, photograph each item, and label salvageable vs. non-salvageable. Certain restoration techniques, air drying, dehumidification, professional contents cleaning, and freeze-drying, recover many items if applied promptly and with the correct protocols. The following H3s provide practical salvage categories and cleaning/drying methods.
Which Items Can Be Salvaged and Which Should Be Discarded?
Salvageability depends on water contamination type and material porosity; non-porous items and electronics often can be restored, while porous items exposed to black water frequently require disposal. Keep electronics for professional drying and tagged evaluation, launder or professionally clean textiles exposed to clean or grey water, and consider disposal for mattresses, stuffed toys, and porous cushioning soaked in black water. Important documents may be salvageable through freeze-drying; photograph originals and seek specialist conservation. Making quick, documented decisions reduces storage costs and clarifies claims with insurers.
- Non-porous items: Usually salvageable after cleaning and sterilisation.
- Porous soft goods with black water exposure: Often non-salvageable.
- Electronics and documents: Retain for professional restoration assessment.
What Are Effective Cleaning and Drying Methods for Flooded Belongings?
Effective cleaning and drying methods depend on material; air drying and dehumidification work for many textiles, professional sterilisation for upholstery, and freeze-drying for wet documents and photographs. For electronics, document serials and avoid powering on; professional electronic restoration uses controlled drying, cleaning, and functional testing. Use dehumidifiers and high-volume air movers to remove moisture from contents and building fabric, and disinfect surfaces exposed to contamination with appropriate agents following safety guidance. When items are valuable or contamination is significant, enlist professional contents restoration to preserve value and provide documented restoration reports for claims.
When Should You Call Professional Flood Damage Assessment Services?
You should call professional flood damage assessment services when damage exceeds simple DIY repairs, when structural or electrical safety is uncertain, when mold is extensive, or when insurance requires documented professional reports for claims. Professionals provide calibrated moisture mapping, structural assessments, documented drying plans, and remediation that saves time and reduces long-term repair costs. Common triggers for calling experts include black-water exposure, widespread moisture across multiple rooms, foundation or load-bearing concerns, and occupant health vulnerability. The next subsections outline specific damage types requiring experts and the benefits of using Flood Squad’s services.
What Types of Damage Require Expert Assessment and Restoration?
Expert assessment is required for large-area inundation, black-water contamination, signs of structural movement or persistent moisture despite initial drying, as well as for complex systems like electrical distribution and HVAC ducting. Scenarios such as basement flooding affecting foundations, floodwaters reaching ceiling cavities, or prolonged wetting of load-bearing timbers go beyond homeowner fixes. Experts use calibrated instruments, invasive probes where needed, and engineering-level judgment to decide on drying, repair, or rebuild strategies. Addressing these complex cases early with professionals prevents escalation into costly structural failure, which is why selecting a rapid-response provider is important.
What Are the Benefits of Using Flood Squad’s Professional Services?
Flood Squadoffers 24/7 emergency response, same-day service, and free on-site assessments to quickly diagnose flood damageand begin containment, drying, and remediation with professional equipment and documented reports. Their comprehensive services span water extraction, structural drying, mold remediation, and specialist contents cleaning, ensuring a coordinated restoration approach that prioritises safety and supports insurance claims. Flood Squad’s on-site assessments include calibrated moisture mapping, timestamped reports, and inventory support that many insurers accept, and rapid initial action reduces secondary damage and often lowers overall restoration costs. To arrange urgent assessment or same-day emergency response, contact Flood Squad for a free initial evaluation and clear next steps.
Flood Squad’s teams can also provide professional documentation and photographic reports that strengthen claims and clarify the scope of work for adjusters, bridging the technical gap between homeowner observations and insurer requirements. Choosing a provider that both acts quickly and documents thoroughly helps speed claims, reduces dispute risk, and ensures the right remediation path is followed.